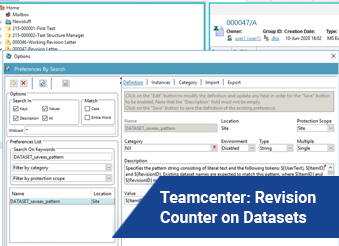
Revision Counter on Datasets in Teamcenter Transcript
Hello, my name is Kameron Baker. I'm an application engineer at Saratech, and this video will show you how to add the revision name or letter to the end of a dataset.
The reason this is useful is when you're searching for a specific dataset, you may come across multiple datasets that had the same exact name and there isn't any distinguishing identifier between them.
So, let's hop in.
Right now, I've got my Teamcenter rich client open, And, you can only make the changes through rich client, it will affect active workspace, but, I like to test on here, because the changes can be made here.
All right, so, as you can see, I have an item created right here.
ID number 47, and I've got three revisions inside of each of them, our two datasets, an Excel and Word doc.
Now, you can see already that this one is revision A, that's correct.
This one is revision B, But the ends of the datasets are still holding on to the a revision.
The same is true for C. Let's say you're trying to search for a dataset. You don't want to look for the revision. You want to go straight to the datasets?
So, what you would do is you'd come up here, you click the search bar, the toolbar.
You come over here, You click a general search, make sure to erase all fields.
And here, we will put the ID name.
And you'll want to specify the type. We'll choose the Microsoft Word X Once that's all filled, you'll click Execute up here. The Screen button in the search results will be here.
Now, there are search results.
They all say 47 A Now, we know that some of them are revision A, B and C, but it's giving us only the A revision. so it can get very confusing, which one is the correct one?
So, the way we do that is we're going to go to Teamcenter Preferences.
You go up to the command bar at the top.
You'll click edit options and this will take you to the dialog box that is the Teamcenter preferences.
Now, we know the name of the preference we want to change.
So we'll go to Search down the bottom.
And then we'll type in, Dataset, underscore.
Oops, Save as Underscore pattern, it should be the only option if you click the option.
It'll come up with fields populated. We'll click Edit.
And you can already see this is actually the code that you want.
Sometimes you'll actually see Autofill, it'll say.
User text, But you don't want that.
The reason why the revision is acting the way it is in this instance is because it's looking for whatever you input.
So, when you add the dataset for the first time, it'll pick up the revision.
But, when you go to revise it, it'll look for what the dataset's name is. It won't count with the revision.
So here, we'll just delete this, and we'll replace it with dollar sign, curly bracket.
And we want the item ID and the name.
And also the revision, So we'll separate that with a backslash dollar sign curly bracket, revision ID, both of these values.
And the way that, you know, the curly brackets and the dollar signs are set up, the preference will know what these are talking about.
The ID will be the 47, and the revision ID will be the revision letter, or number, or whatever naming rule you have, You click Save.
Close.
Sometimes, it doesn't pick it up right away. You can click the Refresh window.
And we'll go to create a new Item.
We'll call this one reeking Revision Letter. Click Finish.
Open up the revision, and we're going to add two of the same datasets in Microsoft Word X and the Microsoft Excel.
So it picked up the A just like it did in the previous one, but let us see what happens when we go to revise.
Go into revision B right here.
There you have it. It picked up the new change and the revision.
Revise that one more time to a C.
There you go.
It revised again to C, so, let's go back to our search.
You shouldn't have to click this, It should still be a little tab up here, and instead of 47, you will search for 49.
You can keep the type the same, click execute.
There you go, so, here you can see a 49 B, 49 B, and 49 C.
You may notice that there are two Cs. Either one will work.
This one sticking out on the end is a revision sequence. I can talk about that in another video.
But if you click either of these A's, it'll take you to the revision A, or C for C, or B, And that's pretty much all there is to it. Please don't forget to like this video, if you thought it was helpful. Please subscribe to his channel for more helpful tips, tricks, and tutorials.
If you have any questions about what I did, feel free to leave a comment below, and I'll be happy to answer anything.
I didn't really go over well enough, or maybe I glossed over something too quickly.
Thanks.
Thanks for checking out our channel. If you like what you saw, make sure to like and subscribe down below, so you don't miss out on any new videos. Follow us on LinkedIn, Facebook, and Twitter for the latest engineering news and information. And to see all of our upcoming events, please visit our website at saratech.com/events.
Comment below to share your thoughts or let us know if you have any questions.
For more videos like this, subscribe to our YouTube Channel.


