
The Best Method to Load & Unload Plastic Filaments for Markforged Industrial & Desktop 3D Printers
Knowledge Base Article | January 2, 2024
Introduction
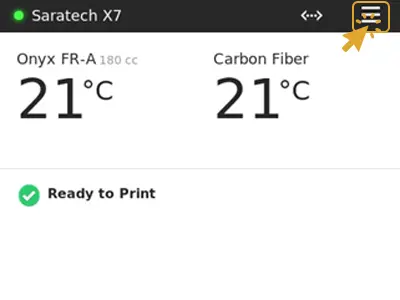
Correctly loading and unloading the plastic filament from your Markforged 3D printer is important for printing successfully. Incorrectly doing so can result in part quality issues or damage to the printer. To unload and load plastic filament into your Markforged printer, follow the instructions below along with the prompts on the touch screen of your printer. The following procedure applies to Desktop and Industrial printers (e.g., Markforged Mark Two, Markforged X7, Markforged FX10).
Supplies
• Wire Cutters
• Scale
Caution
As you work on the printer, remember that the print head will become hot. Exercise caution to avoid any potential accidents.
Unloading Plastic
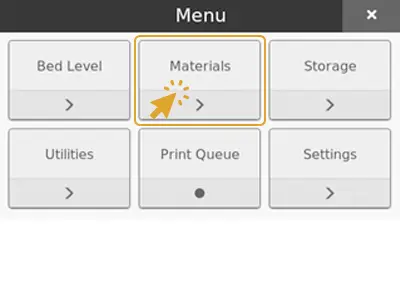
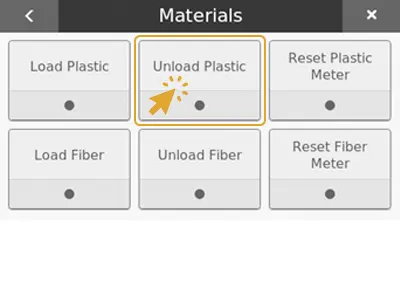
1. Select Menu > Materials > Unload Plastic
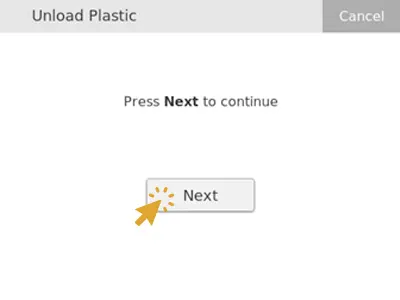
2. Press Next
3. Release the plastic feed tube from the back of the extruder by pushing the black push-to-connect fitting.
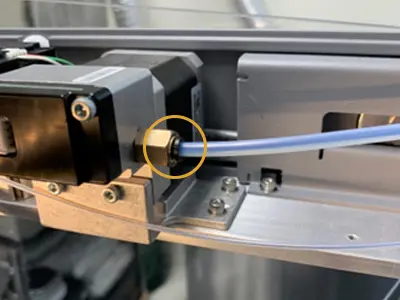
4. Pull the feed tube away from the fitting to expose the plastic filament at the extruder inlet.
5. Use a pair of wire cutters to cut the exposed plastic filament at a 45o angle.
6. Open the dry box and wind the plastic filament back on the spool. Secure the loose end of the filament to the spool. Remove the spool from the dry box and store it in a separate dry box.
Note: Nylon material is hygroscopic and will absorb moisture. Storing Nylon filament in a dry box with desiccant packets is important to prevent the material from getting wet and becoming unusable.
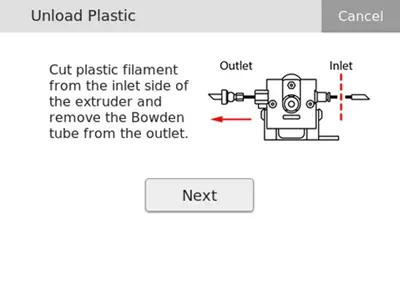
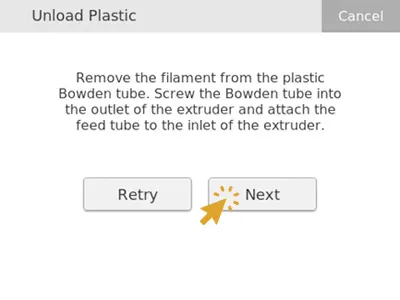
7. Unscrew and remove the Bowden tube from the outlet of the extruder, then Press Next to begin expelling the cut filament.
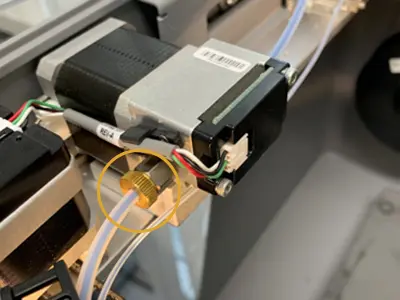
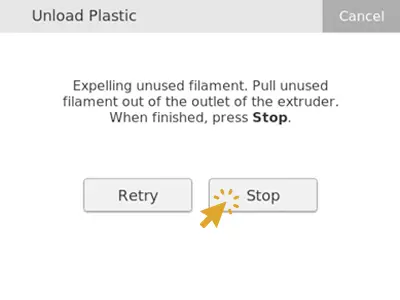
8. Hold the plastic filament at the outlet of the extruder to guide it out of the extruder.
9. Once the plastic is completely unloaded from the extruder, press Stop.
10. Pull the plastic filament out of the Bowden tube.
11. Reinstall the Bowden tube to the outlet of the extruder, then press Next.
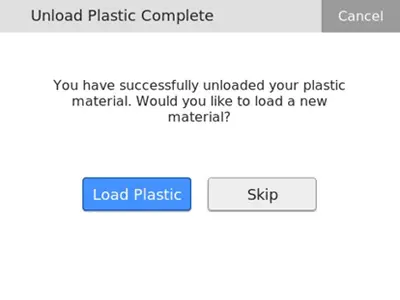
12. Press Load Plastic to load a different spool. Otherwise, press Skip.
13. If you pressed Skip, select whether to cool the printhead or not. Then press Done to exit the utility.
Need Additional Assistance With Markforged 3D Printing? Saratech 3D Printing Experts Can Help.
Connect With a Saratech 3D Printing Expert Today.
Set Up Plastic for Loading
1. Open the dry box connected to your printer and remove the spindle from inside. Pull the magnetic spindle cap and body apart.
2. Prepare to load your spool:
a. New spools: Verify that the packaging of the plastic filaments has no holes. Then remove the spool from its packaging and place the two desiccant packets that it came with inside the dry box. Place the desiccant packets where they will not interfere with the plastic filament from spinning freely inside the dry box.
Note: More than two desiccant packets should not be necessary. Discard old ones if the spool is used up or store desiccant packets with the partial spool you unloaded.
b. Partial spool: If you would like the printer to keep track of the plastic material remaining, weigh the spool in grams.
Note: The printer will automatically subtract the weight of the spool and obtain the weight of the material itself.
3. Place the spool of filaments onto the spindle and attach the spindle caps.
4. Place the spindle and plastic spool into the dry box. Orient the spool so the filament exits from the top of the spool.
Note: The plastic filament is wound under tension. Hold the plastic against the spool to prevent unwinding during the loading process.
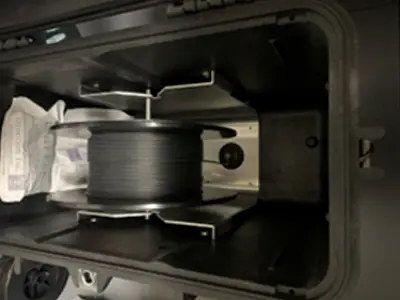
Industrial Series Dry Box
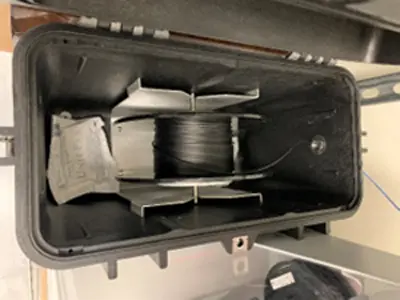
Desktop Series Dry Box
5. Use wire cutters to cut the end of the plastic filament at a 45o angle. This will allow the filament to easily feed into the feed tube and the extruder.
6. Feed the end of the filament into the adapter inside the dry box and all the way through the plastic feed tube. The end of the filaments should extend out to the other end of the feed tube.
7. Close the dry box and secure the latches. Make sure you press the latches until they click twice each to fully close the dry box.
Note: The dry box should always remain closed and fully latched, except when quickly loading or replacing filament. This is to prevent the plastic material from getting wet.
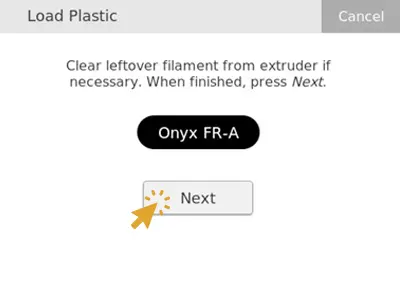
8. Before moving to the next steps, verify that the Bowden tube is clear of any remaining or broken plastic filament. If there is any, please clear the Bowden tube before continuing to load the plastic.
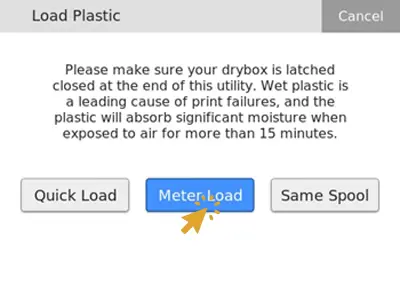
Meter Load Plastic
If you would like the printer to keep track of the material usage during printing, follow the instructions below. Meter loading the plastic will allow the printer to determine how much material is left on the spool and warn you when starting a print job if more plastic is required than what is loaded. The amount of material left will be displayed on the touchscreen and on Eiger.
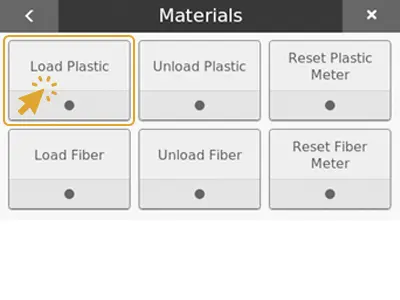
1. Select Menu > Materials > Load Plastic
2. Select Meter Load once prompted.
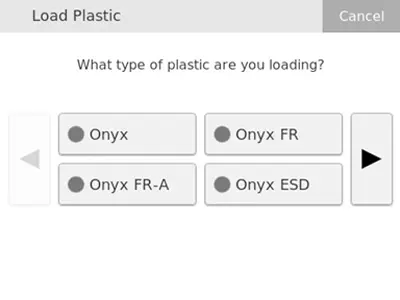
3. Select the type of plastic filament you are loading.
4. Select the type of spool you are loading. Select Full Spool if you are loading a new, standard 800cc spool of material. Otherwise, select Partial Spool.
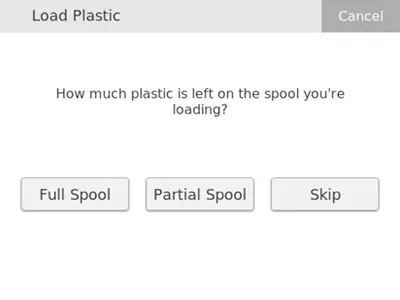
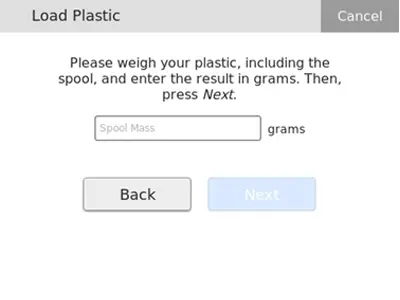
5. If you selected Full Spool, Skip to Step 6. If you selected Partial Spool, provide the accurate weight of the partial spool you are loading
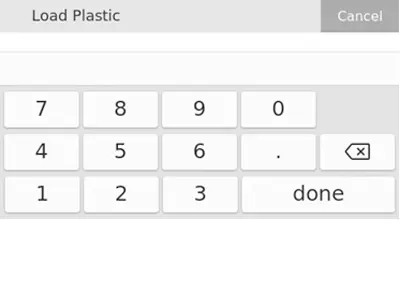
Input the weight of the spool and press Done. Then, press Next.
6. Allow the print head to heat up and then press Next.
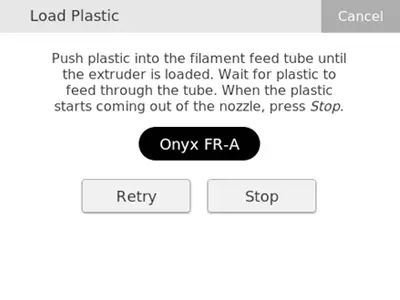
7. Feed the end of the plastic filament from the feed tube into the extruder. Reinstall the feed tube into the extruder’s push-to-connect fitting.
8. Allow the plastic filament to move through the plastic Bowden tube. Press Stop once the plastic starts to extrude from the nozzle. Press Retry if the extruder times out before the filament is extruded.
Note: the extruder will make a clicking noise as material is extruded from the nozzle, this is normal.
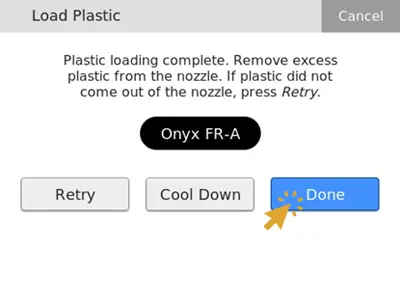
9. Remove any extruded material that collects on the nozzle.
10. Press Done to exit the utility.
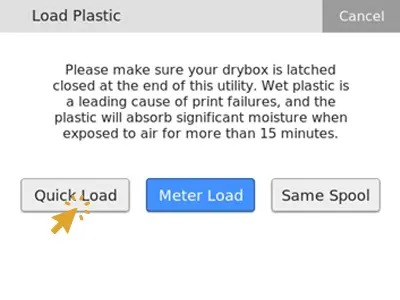
Quick Load Plastic
If you do not want your printer to track how much material is left on the spool, or you do not have the proper scale to measure the weight of your spool, select Quick Load when loading your filament. If a spool is quick loaded, the printer will not alert you when running low on material.
1. Select Menu > Materials > Load Plastic
2. Select Quick Load once prompted.
3. Select the type of plastic filament you are loading.
4. Allow the print head to heat up and then press Next.
5. Feed the end of the plastic filament from the feed tube into the extruder. Reinstall the feed tube into the extruder’s push-to-connect fitting.
6. Allow the plastic filament to move through the plastic Bowden tube. Press Stop once the plastic starts to extrude from the nozzle. Press Retry if the extruder times out before the filament is extruded.
Note: the extruder will make a clicking noise as material is extruded from the nozzle, this is normal.
7. Remove any extruded material that collects on the nozzle.
8. Press Done to exit the utility.
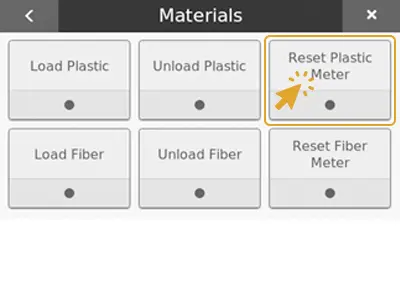
Reset Plastic Meter
Eiger estimates the remaining plastic material conservatively. To improve the accuracy of the material metering, use the Reset Plastic Meter utility.
1. Select Menu > Materials > Reset Plastic Meter
2. Carefully remove the plastic spool from the dry box and spindle. Do not unload the plastic filament from the printer.
3. Weigh the spool.
4. Enter the new spool weight as prompted.
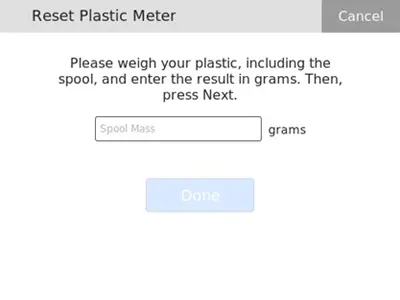
5. Reinstall the spindle and the spool into the dry box. Ensure that the latches of the dry box are properly closed.
